Test webhooks
POST sample JSON to a saved endpoint, inspect the response, and activate pending webhooks.
Open Webhooks → Test.
What this page is for
Webhook test sends sample JSON to a URL you saved on Webhooks → Webhook — not real customer traffic. Use it to confirm your server accepts Kirisan POSTs and returns 200 or 201 before going live.
Pending endpoints need one successful test here before Kirisan delivers live events.
Sample data shown.
Page intro
The subtitle explains the contract:
- Traffic is sample JSON, not live messages
- Pending webhooks become Active after a 2xx response
No webhooks yet
When you have not saved an endpoint, the page prompts you to add one first.

Click Webhooks to open Webhooks → Webhook and create an endpoint.
After save — activation banner
When you click Save → test on Webhooks → Webhook, Kirisan opens this page and remembers the batch you just saved.

One successful test (2xx) activates every endpoint from your last save. Pick any row from that batch — you do not need to test each device separately.
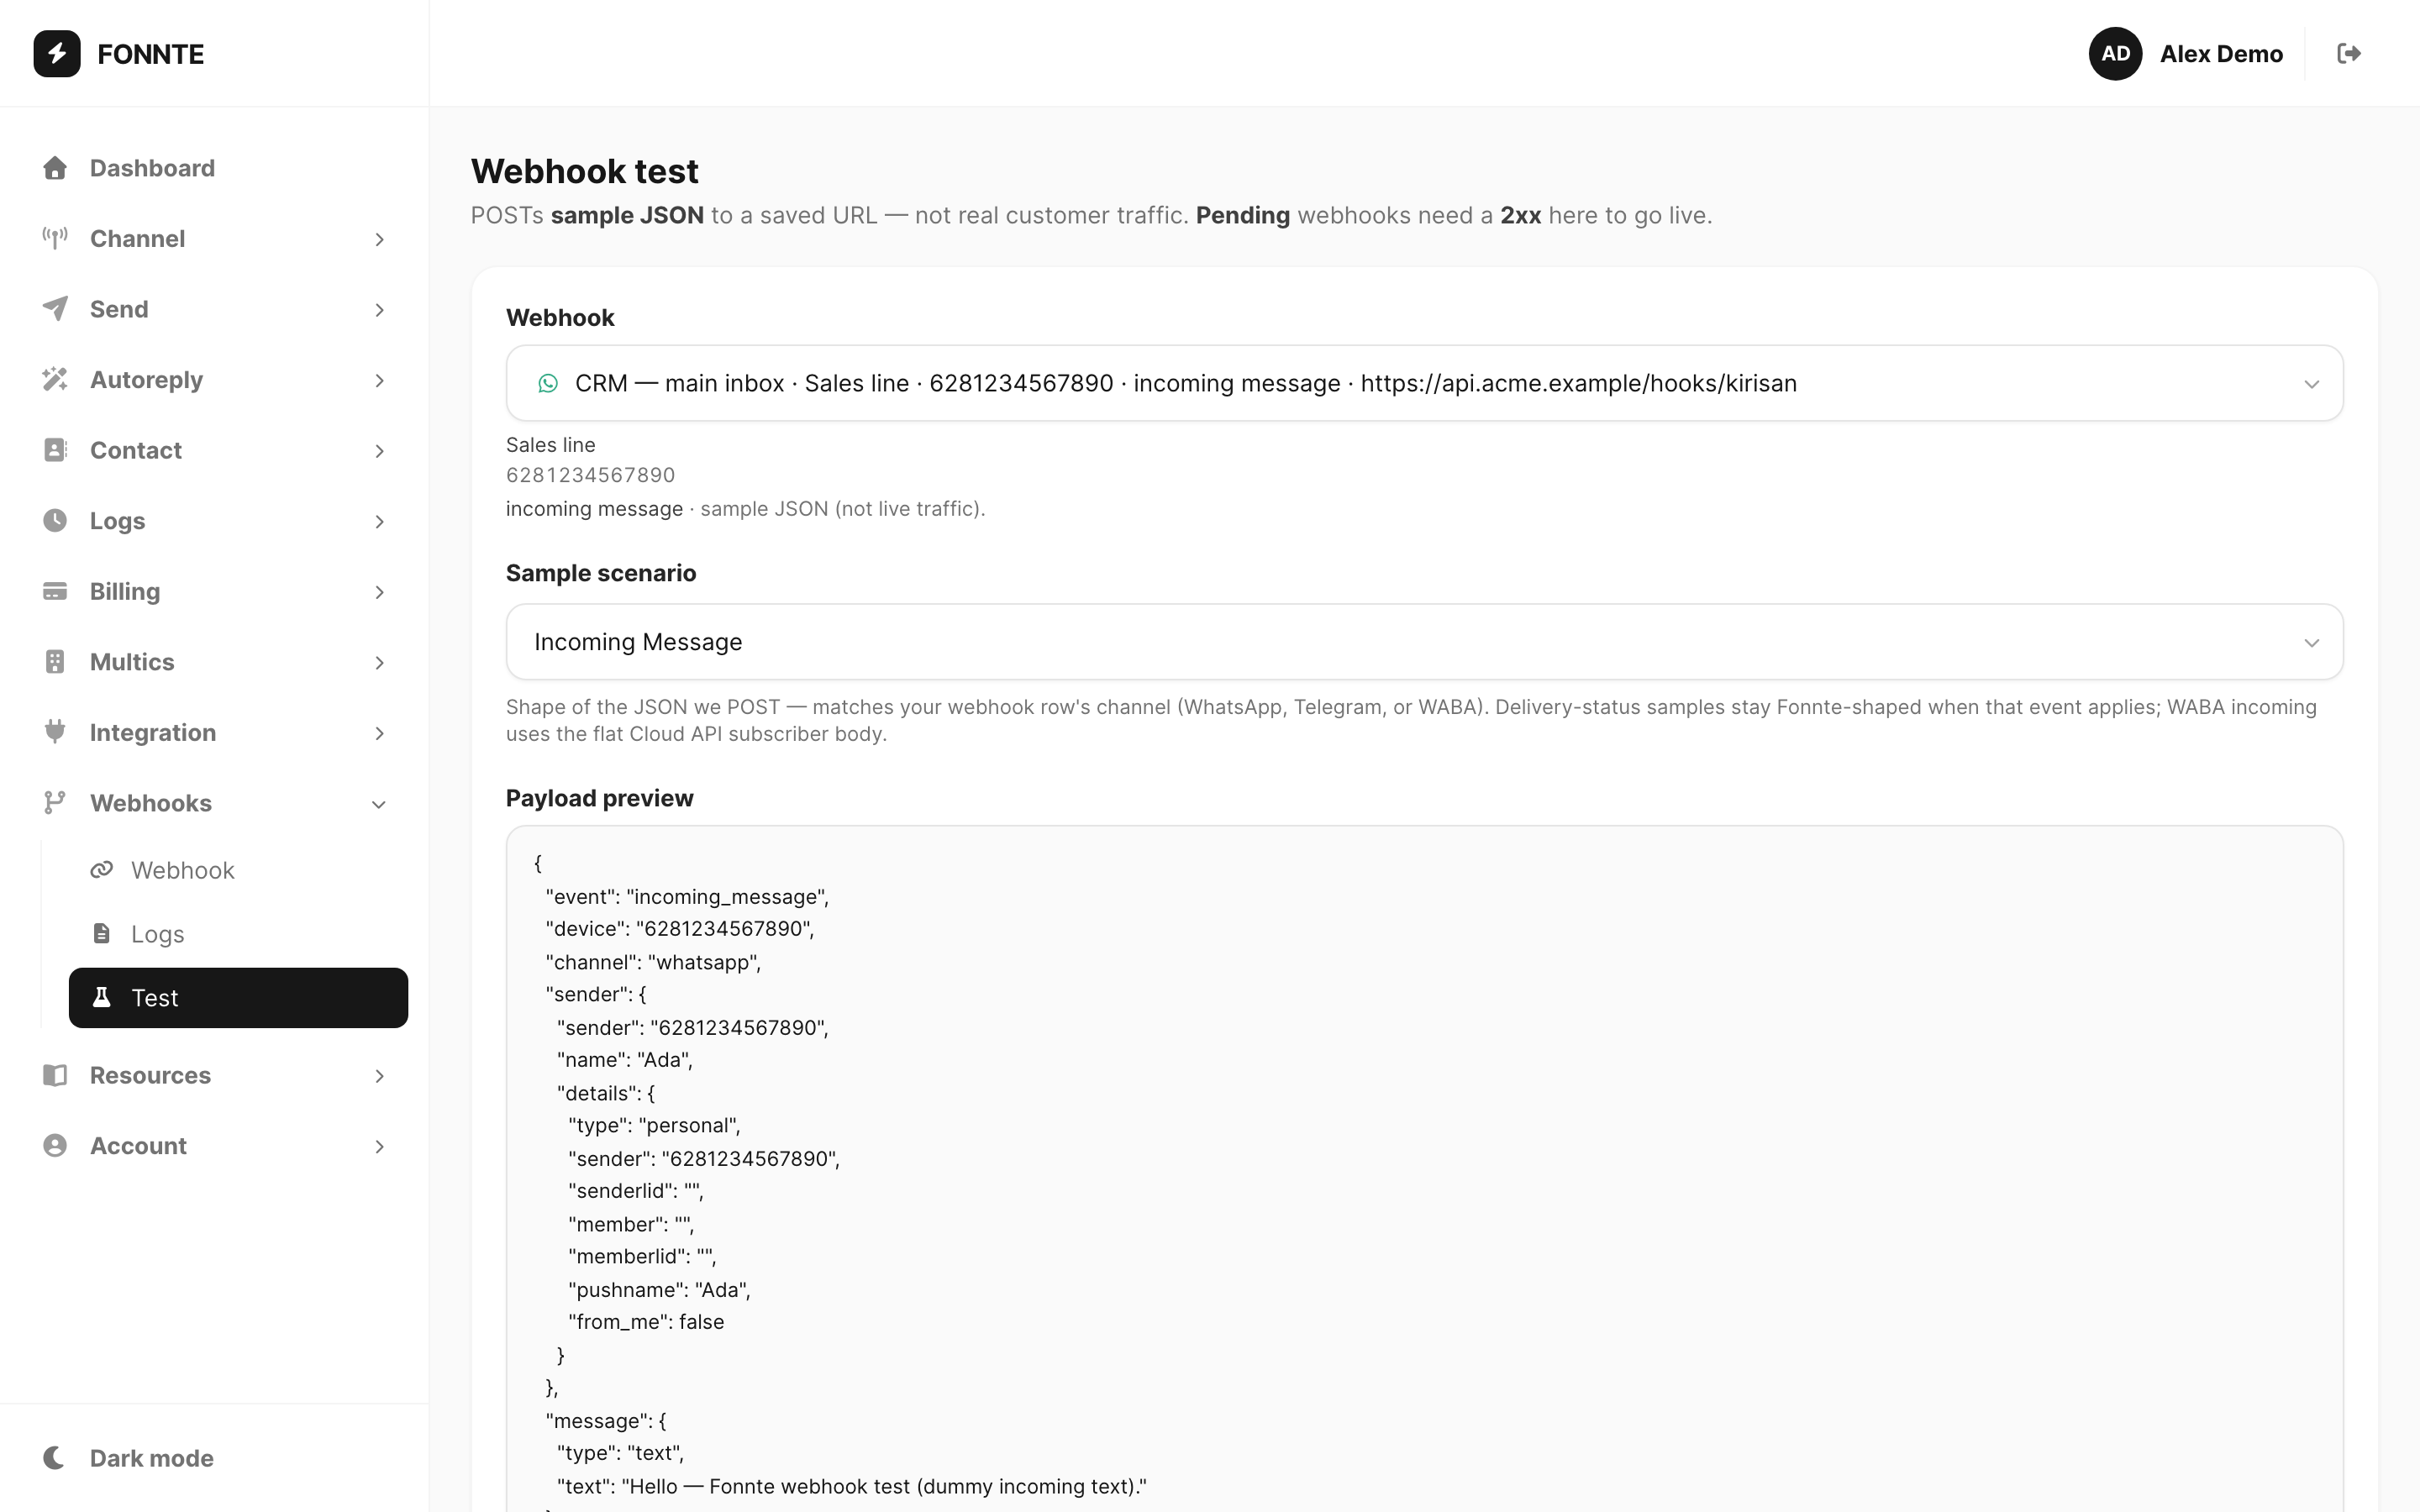
Test form
| Control | What it does |
|---|---|
| Webhook | Choose which saved row to test — label shows name, device, event, URL, and pending when not active yet |
| Device summary | Display name and identifier for the selected row |
| Sample scenario | Event type for this row (Incoming Message or Submission) — matches what you configured on Webhooks → Webhook |
| Payload preview | Read-only JSON Kirisan will POST — shape follows the row’s channel (WhatsApp, Telegram, or WABA) |
| Send test | POST the sample to your URL and show the result |
Test payloads include "production": false so your handler can ignore or route them separately from live traffic.
Sample scenario by channel
| Channel | Incoming Message preview |
|---|---|
| Normalized envelope with sender, message, and metadata | |
| Telegram | Same top-level shape; sender.details includes chat_id and user_id |
| WABA | Flat Cloud API subscriber body for that channel |
Submission previews include submission, answers, started_at, and completed_at.
Send test and read results
Click Send test. Kirisan POSTs to your URL and shows a result card below the form.
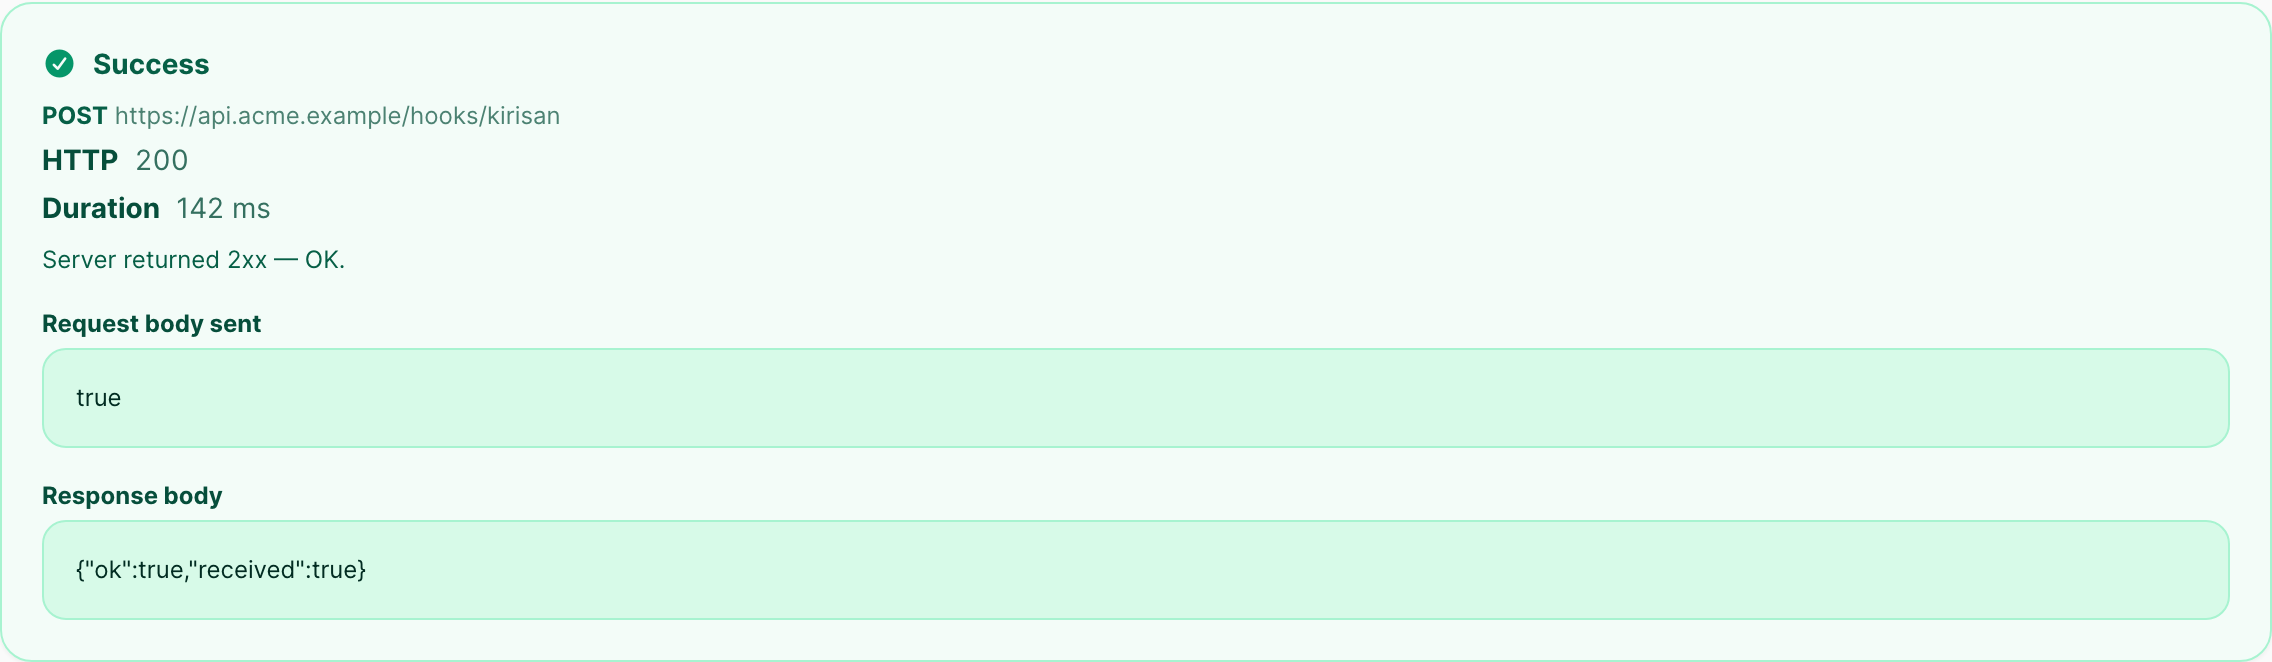
Sample data shown.
| Result part | Meaning |
|---|---|
| Success / Failed | Whether your server returned 2xx |
| POST + URL | Method and destination that was called |
| HTTP | Status code from your server |
| Duration | Round-trip time in milliseconds |
| Request body sent | Exact JSON Kirisan posted |
| Response body | Your server’s reply (truncated when very large) |
On success:
- A toast confirms Webhook test succeeded (2xx)
- Pending rows from the last save batch flip to Active on Webhooks → Webhook
- The Webhook dropdown refreshes — pending suffix disappears
On failure:
- The card turns red with Failed, HTTP status, and error details
- Fix your server, then click Send test again
- Check Webhooks → Logs for the same attempt
What your server should do
| Check | Why |
|---|---|
| Return 200 or 201 quickly | Kirisan treats other codes as failure; slow handlers may time out |
| Accept POST with application/json | Matches delivery on live webhooks |
| Read X-Kirisan-Event and X-Kirisan-Device headers | Route by event and device without parsing the body first |
| Compare X-Webhook-Secret when you set a signing secret | Reject requests that do not match your configured secret |
| Queue heavy work asynchronously | Respond with 2xx first, then process in the background |
Related
- Webhooks reference — configure endpoints and devices
- Webhook payload reference — full JSON for each event
- Webhook logs — review delivery attempts after tests or live traffic
- Run a webhook test — step-by-step tutorial
- Add a webhook endpoint — create an endpoint first
- Resources → Variables — full JSON envelope reference