Email domains
Open Channel → Email → Domains.
What this page is for
You must verify a domain before creating senders on that domain. Kirisan shows DNS records (SPF, DKIM, DMARC, bounce CNAME) to add at your DNS host, tracks sending health, and manages free-tier and paid plans per domain.
You can also turn Receive on so registered addresses can get inbound mail (see Inbox). That uses separate inbound MX records and only turns on after those MX records are verified.
Add senders under Emails only after a domain shows Verified.
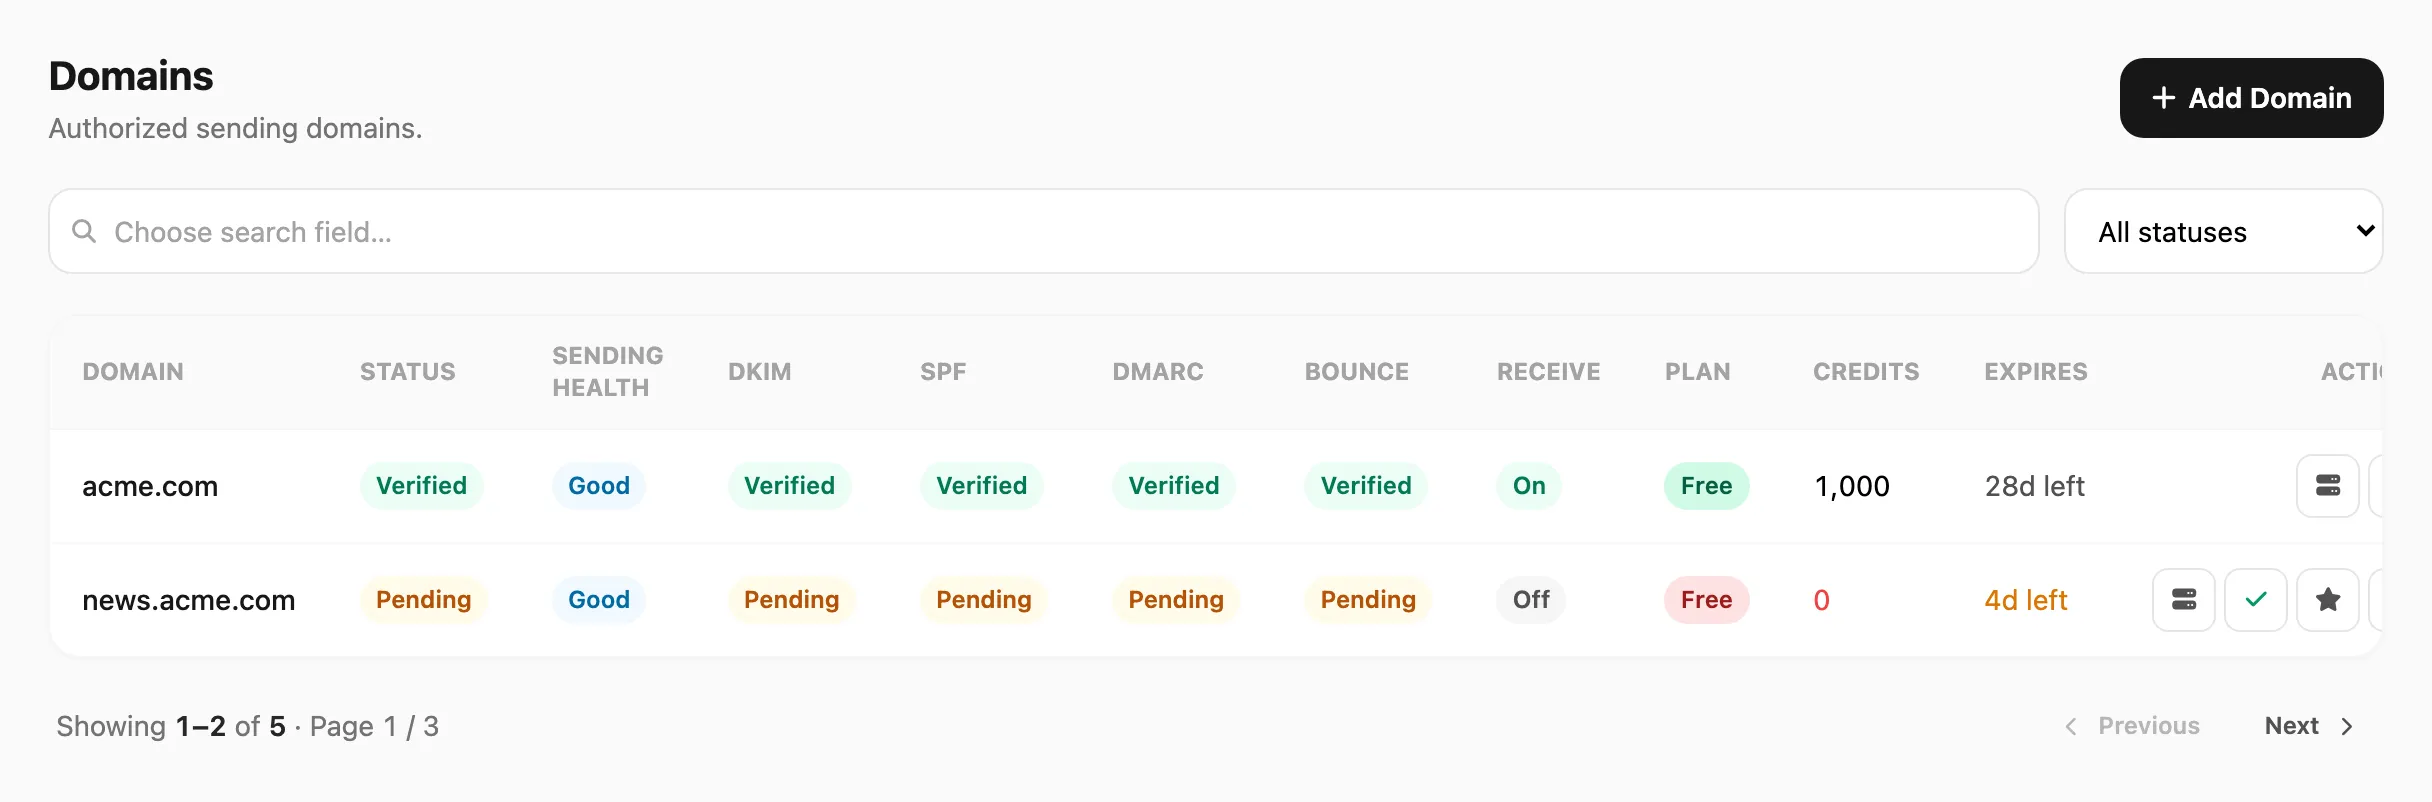
Sample data shown.
| Header control | What it does |
|---|---|
| Add Domain | Register a new sending domain and generate DNS records |
Search and filter
Search is field-based — click the search area first, pick Domain, then type your query.
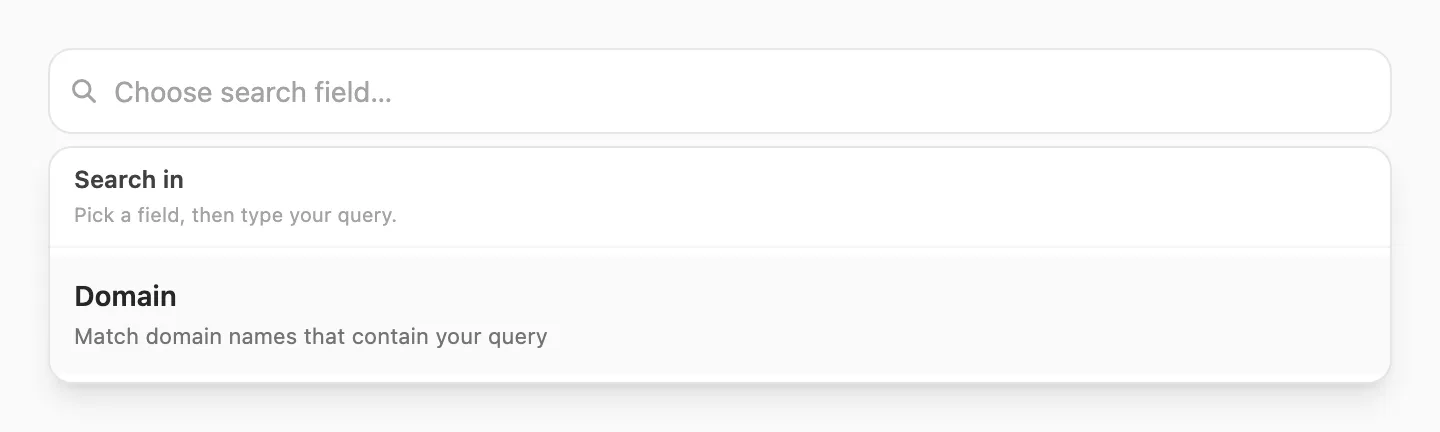
| Step | What happens |
|---|---|
| 1. Click search | A Search in popup opens — you must choose a field before typing |
| 2. Pick Domain | Only one field is available for domains |
| 3. Type | Kirisan filters the table as you type (short debounce) |
The Status filter on the right narrows by verification state:

| Filter | Shows |
|---|---|
| All statuses | Every domain |
| Verified | Domains ready for senders |
| Pending | Domains still waiting on DNS |
| Search field | Matches | Minimum length |
|---|---|---|
| Domain | Domain name that contains your query (for example acme matches news.acme.com) | 3 characters |
Pagination below the table shows 25 domains per page when you have more than one page of results.
Domain table

| Column | Meaning |
|---|---|
| Domain | Sending domain — shows Pending removal when scheduled for deletion |
| Status | Verified (green) or Pending (amber) — overall sending DNS verification |
| Sending health | Deliverability score from bounces and complaints — Excellent, Good, Warning, Review, or Blocked. When Blocked, a small label under the badge shows which kind stopped (transactional, marketing, or raw) |
| DKIM / SPF / DMARC / Bounce | Each auth record — Verified or Pending |
| Receive | On or Off — click to enable or disable inbound mail for this domain |
| Plan | Free or paid plan — click the badge to open Domain plan |
| Credits | Remaining send quota — 0 in red |
| Expires | Days left on the plan — Expired in red; under 5 days in amber |
| Added | When the domain was registered in Kirisan |
| Actions | Icon buttons — see row actions below |
Inbound MX status is not shown as a table column. MX appears only in the DNS popup when you enable receive.
Domain plan
Click any Plan badge to open Domain plan:
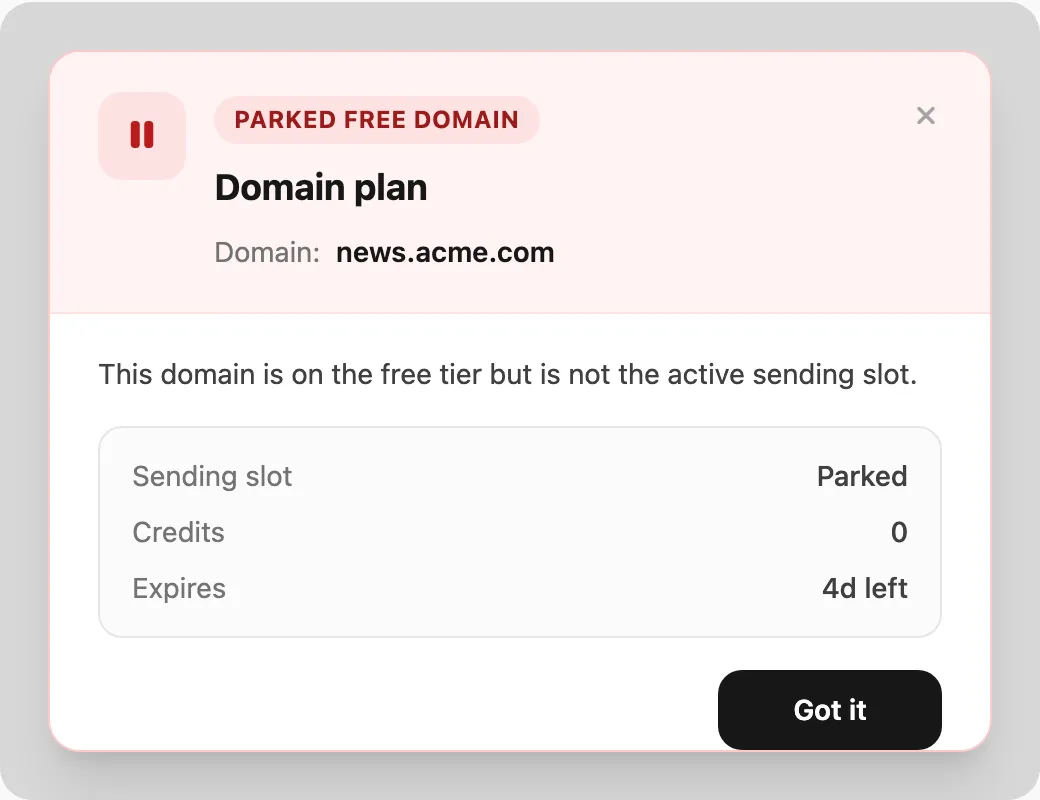
The popup includes:
| Section | What it shows |
|---|---|
| Header | Status badge, Domain, and close () |
| What this means | Whether this domain is the active free slot, parked, or on a paid plan |
| Details | Sending slot, credits, expiry, and plan name |
| What to do next | Switch free slot, add senders, renew under Billing → Order |
| Got it | Closes the popup |
Every new domain starts on the free plan with 1,000 credits and a 30-day validity window. When the active free period ends, Kirisan refills 1,000 credits and another 30 days automatically. When a paid plan expires, the domain returns to free with 1,000 credits (see Plans and quota).
Badge colors in the table:
| Badge | Meaning |
|---|---|
| Green Free | Active free sending domain (only one per account can send on free tier) |
| Red Free | Parked free domain — not the active sending slot |
| Violet plan name | Paid plan (for example Lite) — badge shows the actual plan name |
On the free tier, only the active free domain can send. Use the star action on a parked free domain to switch the slot (at most once every 7 days).
Renewing the same paid plan while it is still active adds credits and extends expiry. Changing to a different plan replaces credits and resets expiry from today. See Plans and quota.
Add a domain
- Click Add Domain.
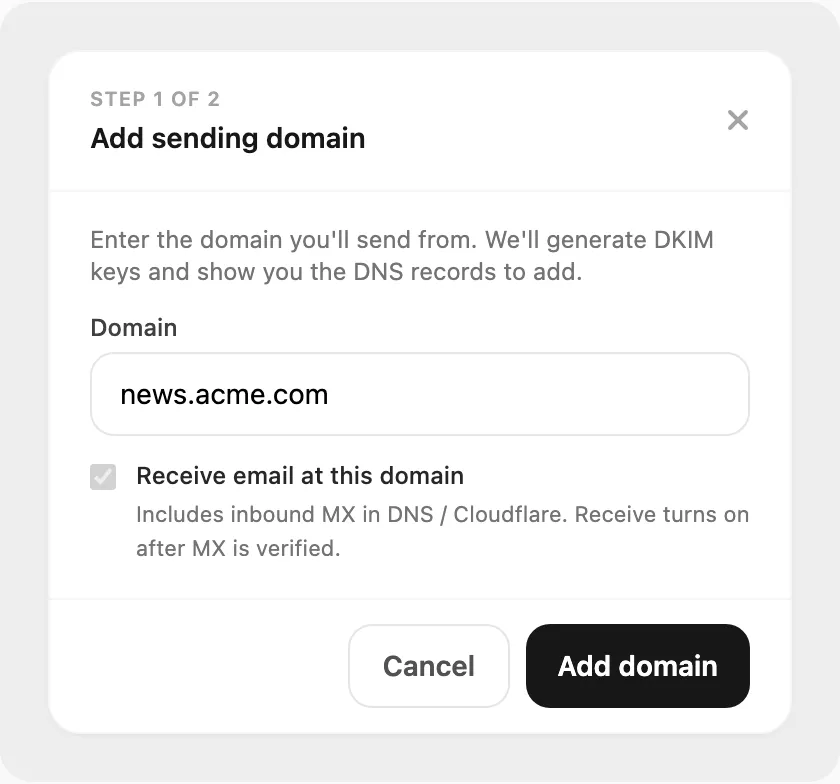
- Enter the domain (for example
news.acme.com). - Optionally check Receive email at this domain if you want inbound MX included in the DNS list (receive still turns On only after MX is verified later).
- Click Add domain. Kirisan generates DKIM keys and shows DNS records.
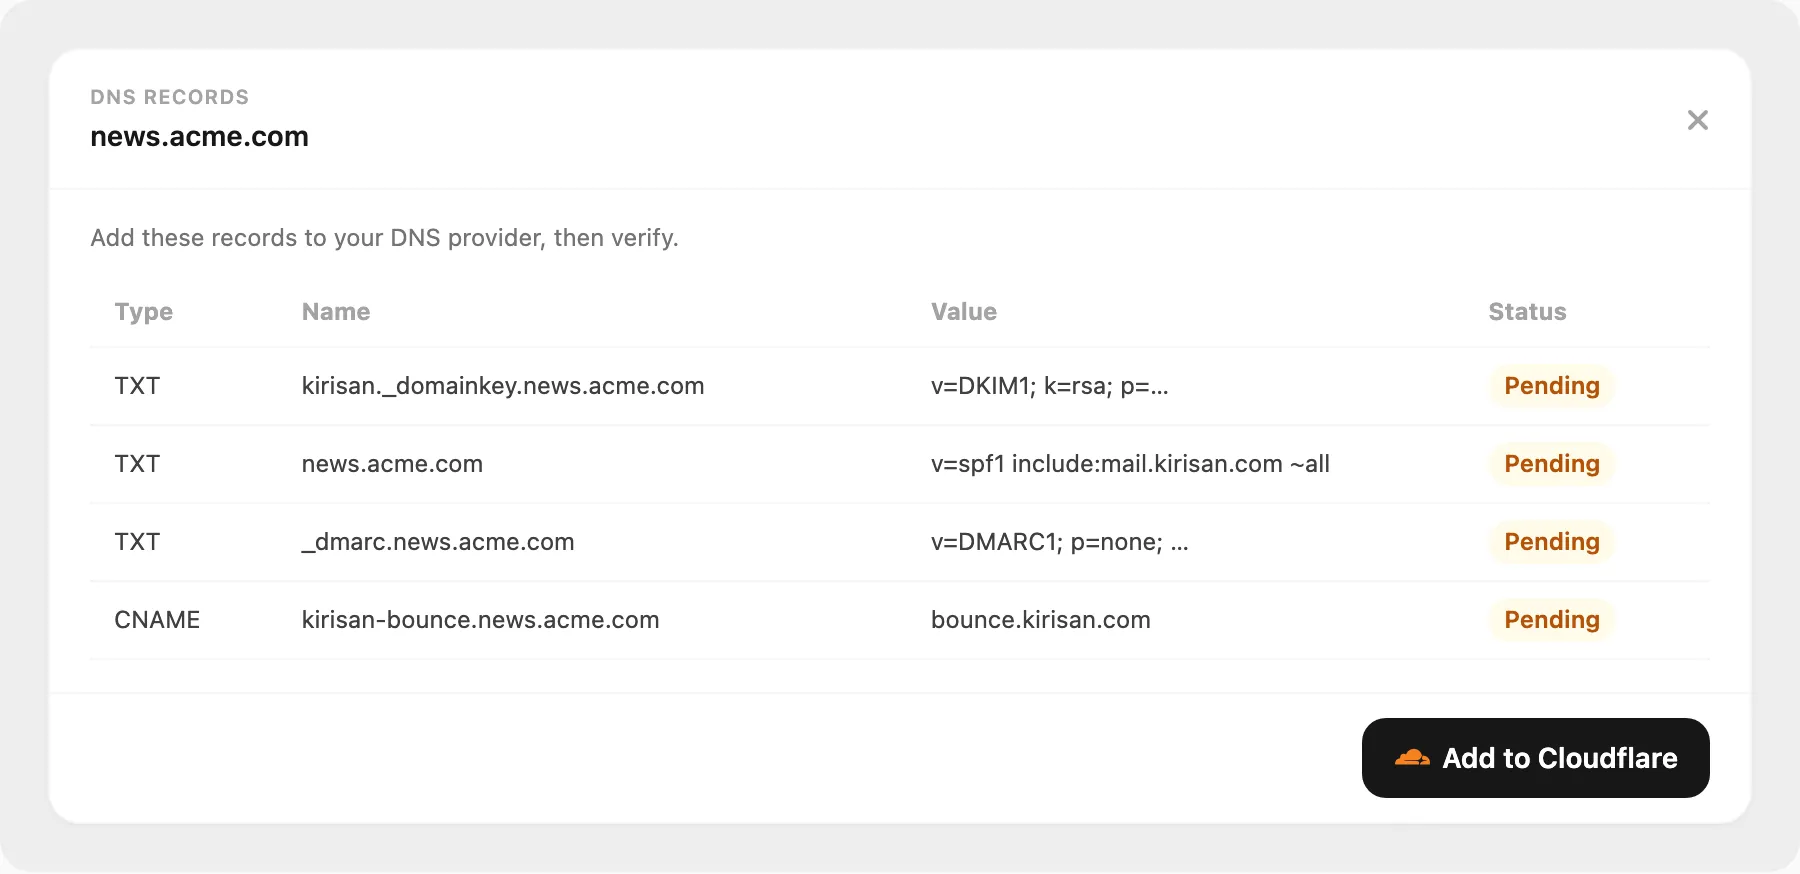
- Add each record at your DNS host exactly as shown, or use Add to Cloudflare.
- Close the popup, then use Verify DNS on the row after propagation (often minutes, sometimes longer).
If you already have SPF on the apex domain, merge into a single TXT record rather than creating duplicates.
Verify DNS
On a row that still needs checks, click Verify DNS. Kirisan checks DKIM, SPF, DMARC, and bounce CNAME (and inbound MX when you are setting up receive).
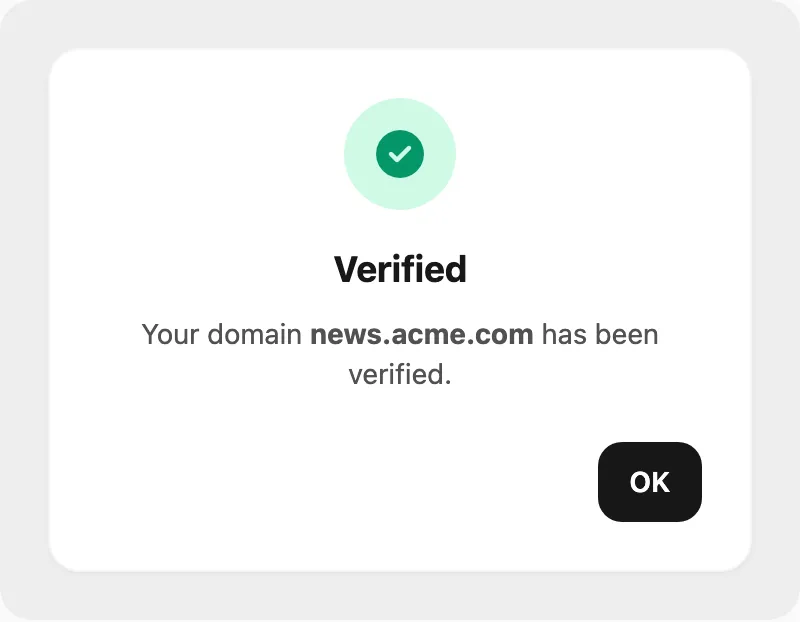
- Verified — domain is ready for senders under Emails.
- Not verified yet — Kirisan explains what is still missing; open DNS Records to copy values again.
You can also open DNS Records anytime without re-adding the domain.
Receive inbound mail
To receive mail at registered addresses (see Inbox), the domain must be the active free slot or on a paid plan (parked free domains reject inbound even if Receive is On):
- Click Receive (Off) on the domain row.
- Confirm the warning — pointing MX at Kirisan replaces your previous mail host for the whole domain.
- If inbound MX is already verified, Receive turns On immediately (no DNS popup).
- If MX is not verified yet, Kirisan opens the DNS popup with inbound MX included:
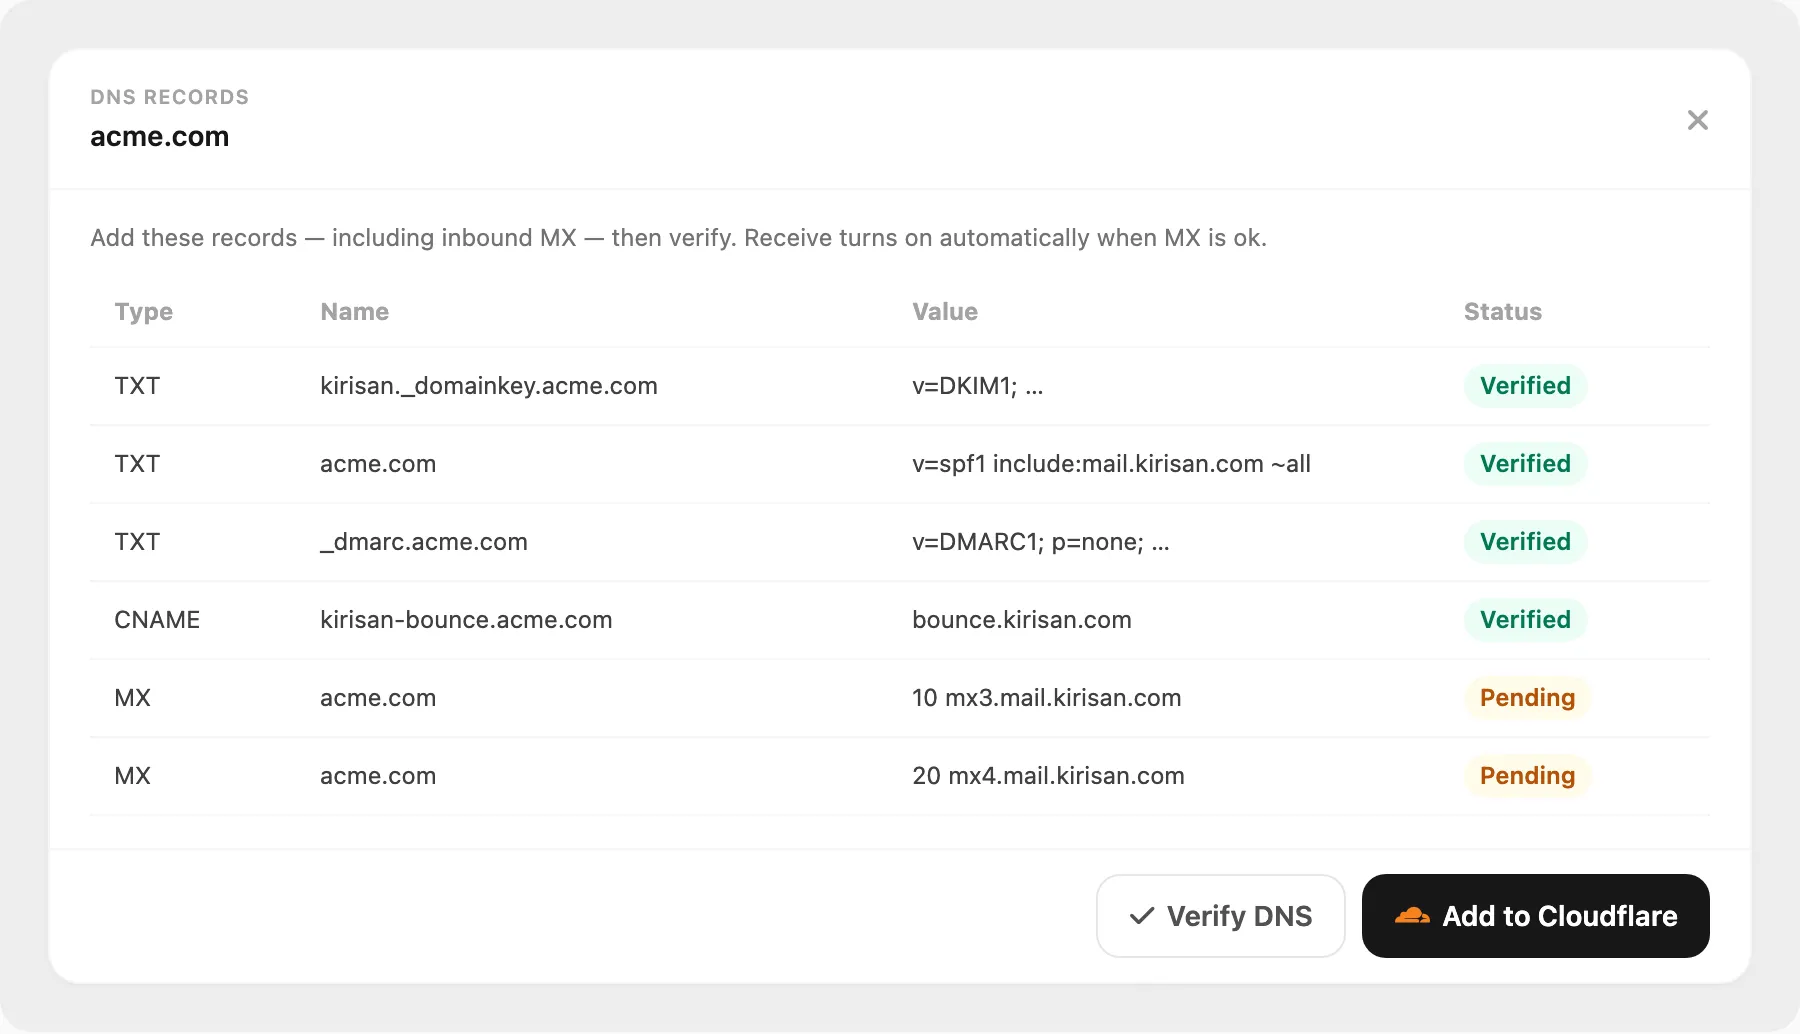
- Add the MX records (manually or with Add to Cloudflare), then click Verify DNS.
- When MX verifies successfully, Receive turns On automatically.
Turning Receive from On to Off happens immediately — no DNS check.
Per-address override (inherit / force on / force off) is on Emails.
Row actions
Which buttons appear depends on verification status, plan, and sending health.
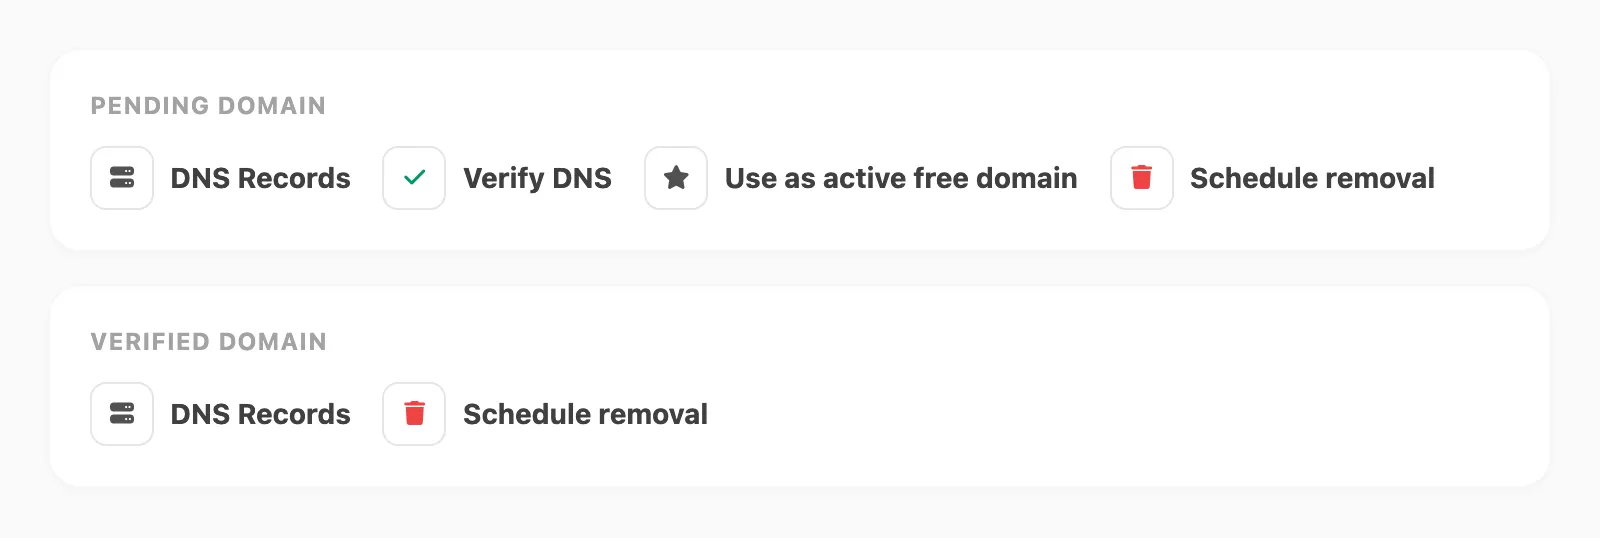
Pending domain
| Action | What it does | |
|---|---|---|
| DNS Records | Opens the DNS records modal (inbound MX only when receive setup needs it). | |
| Verify DNS | Runs verification against your DNS host. | |
| Use as active free domain | On free-tier parked domains — switches the one active free sending slot to this domain. | |
| Schedule removal | Starts a 7-day grace period before permanent deletion. |
Verified domain
Verified rows show DNS Records and Schedule removal, unless sending is Blocked (see below). Verify DNS also appears when bounce or receive setup still needs a check.
Switch free slot
When a free domain is parked, click the star action:
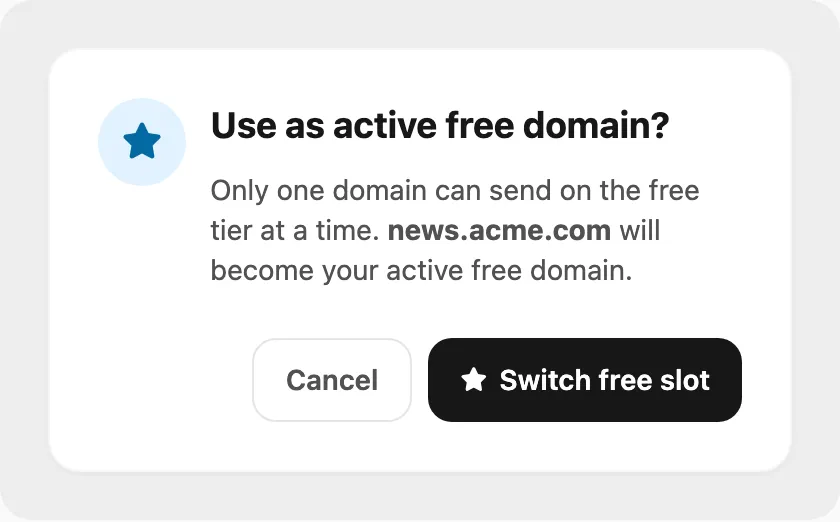
Confirm to make that domain your active free sender. You can switch at most once every 7 days.
Schedule removal
Click on any row:
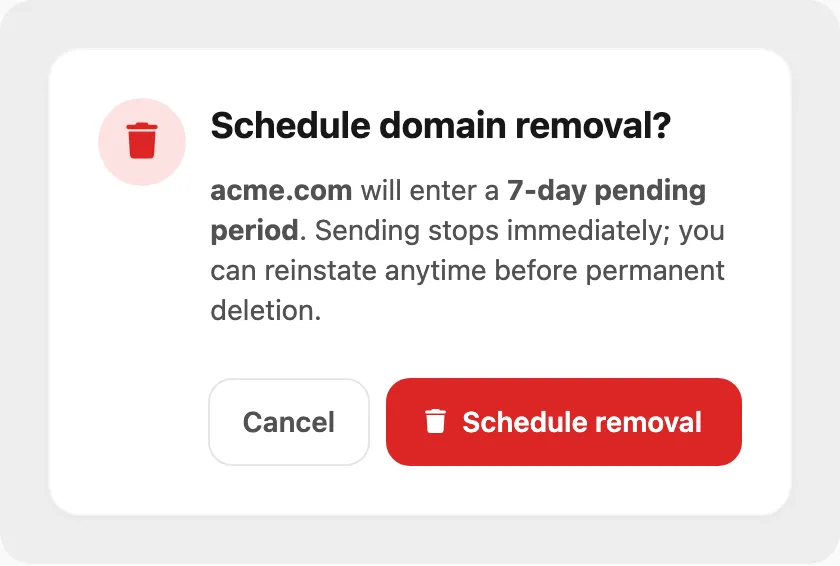
Sending stops immediately. The domain shows Pending removal with a Reinstate action until the grace period ends. Paid domains can only be removed after the plan expires.
Blocked sending health
When Sending health is Blocked, Kirisan pauses one kind of email — not always the whole domain. The label under the badge (transactional, marketing, or raw) shows which kind stopped. Other kinds on the same domain can still send.
A red Sending is blocked banner appears above the table. The Acknowledge action stays until you submit a fix explanation.
- Click Acknowledge on the banner, or Acknowledge block on the row.
- The Acknowledge sending block popup opens. Read the domain (and the kind, if shown).
- Fill in What did you fix? — for example you cleaned invalid addresses, or recipients confirmed opt-in again.
- Submit. The badge may show Pending admin review.
- Wait for an admin to reopen sending. The banner changes to Acknowledgement received. Waiting for admin to reopen sending.
The health badge can also show Suspended until … or Permanently suspended for a health pause. Wait until the date shown, or acknowledge if the button appears.
Day-to-day checks
- Status / DKIM / SPF / DMARC / Bounce — must be Verified before adding senders.
- Receive — On only after inbound MX is verified (or immediately if MX was already ok).
- Plan / credits / expires — click the Plan badge for details; renew under Billing → Order before credits run out.
- Sending health — watch for Warning or Blocked after high bounces or complaints.
- Free tier — confirm the domain you send from is the green Free active slot, not a red parked one.
Related
- Inbox — read received mail and manage block / spam rules
- Plans and quota — free tier, renewals, plan changes, and expiry
- Emails — create senders on verified domains
- Templates — design HTML layouts with variables for sends
- Email log — row-level delivery status per send
- Statistics — bounce and complaint rates for deliverability